Winterizing Your Hive: Essential Honey Bee Hive Insulation Strategies
As the winter chill sets in, we all want to ensure our honeybee colonies stay warm and thriving
That’s where hive insulation comes in – a smart and essential strategy to keep our beloved pollinators cozy and comfortable.
Insulating your hive has many benefits, such as conserving your bees’ energy, which in turn increases your honey supply. Some popular insulation choices for honeybees are straw, cork, quilt boxes, and hive wraps.
In this article, we’ll explore the ins and outs of hive insulation for honeybees, understanding its importance, benefits, and various methods.
Understanding the Wintering Process for Honey Bees

These little creatures have some incredible survival strategies up their sleeves, and it all starts with the way they prepare for the winter months ahead.
Cluster Formation
As temperatures drop, honey bees become masterful thermoregulators. They form what’s known as a “cluster” inside the hive to stay warm.
Imagine a tight-knit group of bees huddling together, generating and conserving heat collectively.
This cluster is like their central heating system, ensuring they survive the chilly weather. The honey bees gather near the center of the hive. This strategic choice is to minimize heat loss.
Hive Architecture
Your bees have the ultimate winter hack – a hive cover. It’s like their own roof, shielding them from all the wintery drama – rain, wind, you name it.
I remember when I first saw them doing this – it was like watching them put on their winter coats. It’s adorable how nature has its way of taking care of its own.
Now, let’s talk hive vibes. Their hive isn’t just a single story – it’s a bee high-rise! They stack these layers, calling them “hive bodies.” It’s like their version of a pantry, filled with honey and pollen treasures. I’ve peeked inside these layers, and it’s like a bee buffet in there!
And get this – they’re not just storing food; they’re having a party around it. They form a tight-knit bee squad around their stash, like they’re having a winter picnic. This way, they can munch on honey and pollen whenever they fancy, even on the chilliest days.
Beekeeping Intervention
Now, let’s talk about your role in all of this, as a beekeeper. You can lend a helping hand by providing an insulated hive.
Picture it like giving our bees an extra layer of cozy blankets for their hive. Insulated hives help trap the heat generated by the bees, maintaining a stable and warm environment for the colony.
What Are the Benefits of Hive Insulation?
Insulating your hive can make a world of difference for our busy bees, especially in colder climates and during those harsh cold months. Here’s why.
To Prevent Heat Loss
Insulation helps maintain a stable temperature inside the hive. It keeps the cold weather at bay, ensuring that our bees don’t have to work overtime to stay warm.
Energy Efficiency
With the right type of insulation, our bees can conserve their energy. They won’t have to use as much of their precious honey reserves just to keep the hive warm.
Protecting the Entire Hive
Insulation covers all the nooks and crannies, providing a snug and cozy environment for the entire colony. It increases their chances of overwintering.
Types of Insulated Hive Materials for Winter Months
When it comes to insulating honey bee hives and protecting them from cold temperatures, there are several effective materials and methods to consider as a beekeeper. Let’s explore some popular options:
Quilt Boxes
Quilt boxes are nifty contraptions that act like bee spa days for moisture and insulation. hese are like little magic houses I place right on top of the uppermost hive box. Inside, I pack them with cozy materials like wood shavings or straw. It’s like giving my bees a cozy blanket to snuggle under.
They absorb excess humidity and stop it from turning into those pesky drips inside the hive. Plus, they add an extra layer of warmth, like a cozy hoodie, ensuring my colony stays toasty.
Hive Wraps
Hive wraps are like warm blankets for your beehives. They are made of insulating materials like black sheeting or felt stuffed with fiber or cotton and are wrapped around the outside of the hive.
These wraps provide an extra layer of insulation, helping to retain heat and keeping the cold air out. Hive wraps are easy to install and can be removed when temperatures rise.
Foam Boards
Foam boards are another excellent choice for hive insulation. You can place these lightweight, rigid boards on the inner walls of the hive to provide added insulation.
When I used them, they created a barrier against the cold and helped my bees maintain a consistent temperature inside the hive. Foam boards can be customized to fit various hive types, including wooden hives.
Cork Insulation
Cork is a renewable and eco-friendly option for hive insulation. Its natural properties make it an excellent insulator in my experience. It does a suitable job to keep the hive warm and cozy during colder months.
When selecting cork for insulation, I suggest opting for high-quality, untreated cork that hasn’t been chemically processed.
Measure the sides, top, and bottom of your hive bodies, and carefully cut the cork to the right size. You can use a sharp knife or saw for this. Ensure the cork fits snugly against the walls of the hive to provide effective insulation.
Using a non-toxic adhesive, like beeswax or a water-based glue, adhere the cork pieces to the inside walls of the hive bodies.
Expanded Polypropylene (EPP) Insulation
EPP is a lightweight, durable material with excellent thermal insulation properties. It provides reliable protection against cold temperatures and ensures the bees stay comfortable in their hive.
Straw Insulation
Straw, a traditional choice for insulation, provides natural warmth to the hive. It’s often used as an outer cover or lining for wooden hives, contributing to their insulation and protecting the bees from the cold weather.
Get your hands on some good-quality straw. You want straw that is clean, dry, and free from any mold or pests. Opt for long-stemmed straw for better insulation.
Begin by layering the bottom of the hive with straw. This creates a natural buffer between the hive and the cold ground. It helps prevent moisture from seeping into the hive and keeps your bees dry.
Now, surround your hive with straw bales. Stack the bales around the hive, leaving some space for the hive entrance. The straw bales act as natural windbreakers, shielding the hive from harsh winter winds.
Place a thick layer of straw on top of the inner cover. It provides additional insulation for the bees and helps regulate the hive’s temperature.
Ensure there’s still adequate ventilation for the hive. You don’t want to trap excess moisture inside.

Polystyrene Insulation
Lightweight and easy to handle, polystyrene is a popular choice for hive insulation. It provides excellent thermal properties, keeping the hive warm even in freezing weather. Polystyrene is suitable for both wooden hives and those made from other materials.
Silver Bubble Insulation
Silver bubble insulation consists of layers of foil and air bubbles, creating a highly reflective and insulating material. It’s often used as an outer cover to reflect sunlight and maintain a stable temperature within the hive.
Measure the sides, top, and bottom of your hive bodies. Carefully cut the silver bubble insulation to fit these measurements using scissors or a sharp knife.
With the reflective side facing outwards, adhere the silver bubble insulation to the inside walls of the hive bodies. You can use a non-toxic adhesive like beeswax or a water-based glue for this.
If your hive has an outer cover, consider adding a layer of silver bubble insulation to the underside of the cover as well. It will further help regulate the hive’s temperature and protect it from extreme weather conditions.
Ensure the hive entrance remains unobstructed. Your bees need easy access to come and go freely.
Snow Insulation
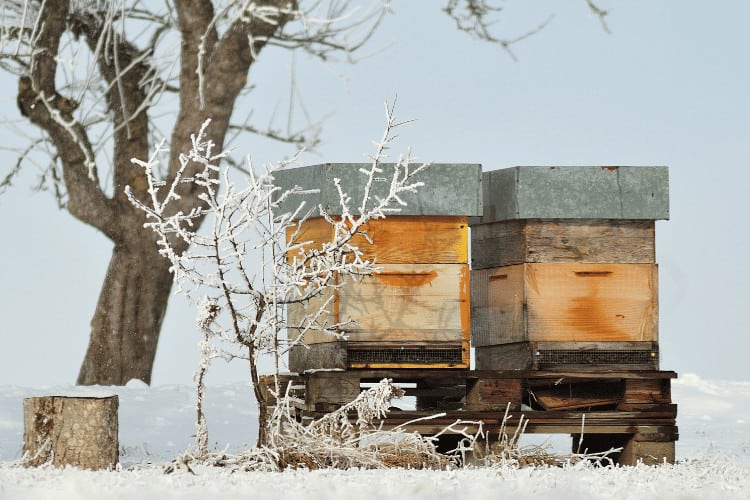
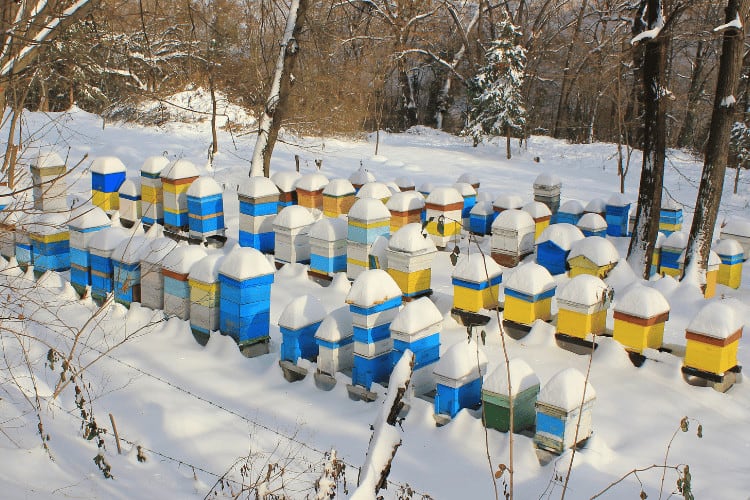
Snow has excellent thermal insulating properties. As it accumulates around the hive, it forms an insulating barrier that helps retain the heat generated by the bees inside the hive.
Snowdrifts around the hive can act as windbreaks. The dense snowbanks block cold winds from reaching the hive entrance, reducing heat loss and maintaining a calmer environment for the bees.
Besides that, bees need access to water, even in winter. When snow surrounds the hive, it can serve as a source of water for the bees. They can consume it as it melts, ensuring they stay hydrated throughout the colder months.
Should You Use a Beehive Heater?
Beehive heaters, also known as hive warmers, are a hot topic in winter beekeeping. Let’s explore their pros and cons to see if these devices are worth buzzing about.
Pros
From winter protection to enhancing brood-rearing activity, beehive heaters offer multiple benefits.
Winter Warmth
Beehive heaters are designed to stabilize the hive’s temperatures, even during cold weather. From my experience, they provide a warm environment that helps the bees survive the winter months comfortably.
Boosting Brood Rearing
With a hive warmer in place, you won’t have to worry about the colony maintaining an optimal temperature for brood rearing. This means the queen can lay eggs by early spring, and the colony can build up its population, which is essential for a strong and healthy hive.
Preventing Starvation
Bees use up more energy to stay warm during winter. A hive heater will help reduce energy consumption, ensuring the bees have enough honey stores to last through the colder months.
Minimal Condensation
Hive heaters can also reduce condensation inside the hive. Excess moisture can be harmful to bees, leading to issues like mold and chilling. With proper temperature regulation, condensation is kept to a minimum.
Cons
Here are some disadvantages of beehive heaters worth considering.
Costs
One significant drawback of hive heaters is their initial cost and ongoing electricity expenses. They require a power source, which can add to your beekeeping budget.
Overheating Risks
If not monitored carefully, hive heaters can overheat the hive. Bees can become stressed or even suffer heat-related damage. Proper temperature control is crucial to avoid these risks.
Dependence on Electricity
In areas with unreliable power supply or during emergencies, hive heaters may not be a viable option for you. This reliance on electricity can be a limitation in some beekeeping setups.
Common Mistakes to Avoid in Hive Insulation
When it comes to hive insulation for honeybees, we want to get it right to ensure our bees are well taken care of during the winter.
However, there are some common mistakes that you, as beekeepers, should be aware of and avoid at all costs. Let’s take a look at these potential pitfalls:
Over-insulation and Its Consequences
It’s tempting to go overboard with insulation, thinking that more is always better. Nonetheless, too much insulation can trap excess heat inside the hive, leading to overheating.
Bees are master thermoregulators. If they can’t dissipate heat, it can stress the colony and even cause death. So, strike a balance and avoid turning your hive into a sauna.
Lack of Ventilation and Moisture Problems
Proper ventilation is crucial for hive health, even in winter. Without adequate airflow, moisture can accumulate inside the hive, creating a damp environment that bees despise.
Excess moisture can lead to mold growth, cold bees, and weakened colonies. Keep those ventilation holes open to allow moisture to escape and maintain a dry hive.
Using Improper Insulation Materials
Not all insulation materials are suitable for beehives. Some may contain harmful chemicals or be too dense for effective insulation.
Make sure to choose insulation materials that are safe for bees and provide the right level of warmth without impeding ventilation.
Neglecting Regular Hive Checks During Winter
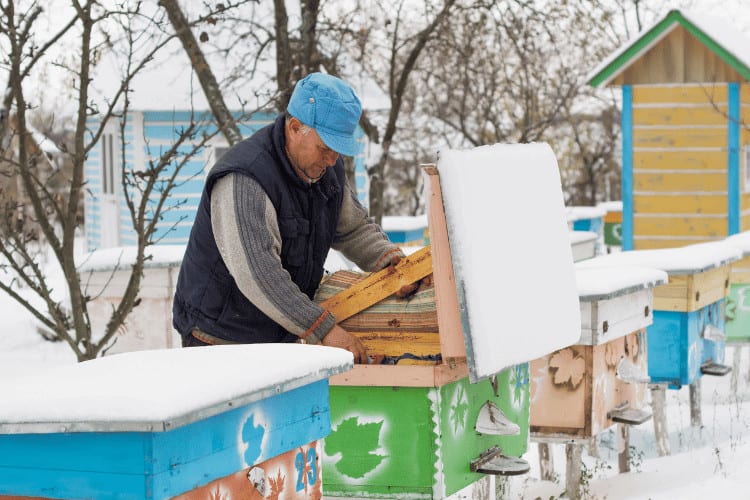
Winter can be challenging for bees, and regular hive checks are essential. Don’t assume that once you’ve insulated the hive, you’re done until spring.
Monitor the hive regularly to ensure the insulation is intact, the bees have enough food, and there are no signs of trouble.
Other Ways to Winterize Your Honeybee Hive
Winterizing your honey bee hive is essential to ensure the survival and well-being of your colony during the colder months. Besides hive insulation, there are several other effective methods you can use to prepare your bees for winter:
Leaving Honey Stores
As winter approaches, you need to check that your hive has enough honey stores to sustain the colony through the winter.
Bees will need ample food to survive when foraging becomes scarce. Ensure they have sufficient honey reserves, and if necessary, consider leaving more honey frames or supplemental feed to bolster their food supply.
Before doing so, you can check if they have enough honey stores already by lifting the back end. If it feels heavy, chances are, the honeybees have enough reserves.
Installing Feeder Cups
You can place feeder cups or frame feeders inside the hive to provide additional food for the bees.
These feeders can be filled with sugar syrup, which serves as an emergency food source during winter when natural nectar is in low supply.
Feeder cup installation is a valuable technique to provide your honeybees with a much-needed food source during the winter months. Let’s explore how to install feeder cups effectively.

Using Comb with Empty Cells
Fill combs with empty cells with a honey-water mixture. Prepare a 5:1 honey to water mix and use a turkey baster to carefully squirt the mixture into the empty cells.
Using a Shallow Bowl or Container
Find a plastic container you can recycle from your grocery purchases. Ensure the container is shallow enough to slide under one to three combs, but deep enough to hold sufficient food, so you don’t need to refill it too often.
Placing the Feeder
Slide the container under the selected combs. Cold bees can’t only move so far, so you’ll want to place the food source close to them. Put sticks in the container. Otherwise, bees might drown when they try to get to the food.
Timing and Temperature
Install the feeder in the fall on a warm day when the bees are warm enough to fly from the hive (about 50 degrees F). Work quickly during the installation to avoid dropping the hive temperature significantly.
Reducing Hive Entrance
During winter, it’s a good idea to reduce the hive entrance size. A smaller entrance helps the bees defend against pests and predators, and also conserves heat.
Bees can more efficiently guard a smaller entrance from potential threats.
FAQs
What temperature do you insulate bees?
Insulation temperature is crucial for honeybees to maintain the ideal brood nest temperature, which needs to be between 94 to 96 degrees F.
This temperature range is essential for the proper development of broods, including eggs, larvae, and pupae. Proper hive insulation supports these efforts.
Should hives be in the sun?
Yes, generally, hives should be placed in full sun to keep them warm and dry, with some shade during the hottest hours of the afternoon.
Can a hive get too hot?
Yes, a hive can get too hot. Bees work diligently to regulate temperatures, concentrating in the brood area to keep it within the range of 91 to 97 degrees F.
If it becomes too hot, they may stop brood production, potentially leading to hive failure.
Final Thoughts
In conclusion, hive insulation for honeybees is a critical aspect of responsible beekeeping, especially during winter.
By providing the right amount of insulation, ensuring proper ventilation, and using suitable materials, you can create a cozy and comfortable environment for our bees to thrive.
Avoid common mistakes like over-insulating, neglecting ventilation, using improper materials, and skipping hive checks. Striking a balance in our approach will lead to healthier and stronger bee colonies.
